Building a Plywood Boat on a Budget: A Step-by-Step Guide
Dreaming of cruising the open water but don't want to break the bank? Building a plywood boat can be a rewarding and affordable way to realize your nautical aspirations. With a little time, effort, and the right materials, you can construct a seaworthy vessel that will provide years of enjoyment. This guide will walk you through the essential steps, ensuring you embark on your boatbuilding journey with confidence.
Step 1: Choosing Your Plywood Boat Design
The first step is selecting a design that aligns with your skills, budget, and intended use. Explore online resources, boatbuilding books, and forums for inspiration. Consider the following:
Boat Type:
- Rowboats: Classic and simple, ideal for leisurely paddling.
- Dinghies: Small, versatile boats for sailing or rowing.
- Kayaks: Sleek and efficient for solo paddling.
- Canoes: Roomy and stable for tandem paddling.
Size and Capacity:
Determine the desired length, width, and weight capacity based on your intended use and the number of people you'll be carrying.
Construction Complexity:
Choose a design within your skill level. Start with simpler plans if you're a beginner and gradually tackle more intricate builds as you gain experience.
Step 2: Gathering Materials and Tools
Once you've chosen your design, gather the necessary materials and tools. Here's a basic list:
- Marine-grade plywood: Opt for high-quality plywood specifically designed for boat construction. This is crucial for durability and water resistance.
- Epoxy resin and hardener: Use epoxy for bonding plywood sheets and sealing the boat against water penetration.
- Boatbuilding plans: Obtain detailed plans from a reputable source or design your own using software like AutoCAD or SketchUp.
- Tools: Invest in basic woodworking tools like a circular saw, jigsaw, drill, clamps, and sandpaper.
- Hardware: Gather fasteners like screws, bolts, nuts, and washers, as well as any required fittings (oars, seats, etc.).
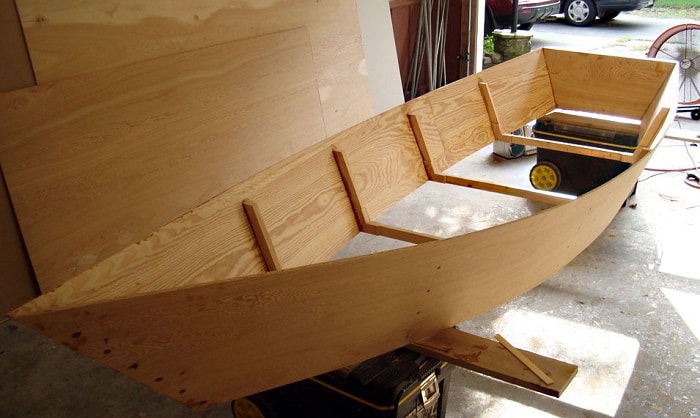
Step 3: Cutting and Assembling the Boat
Carefully follow the instructions in your boatbuilding plans for cutting the plywood sheets. Use a circular saw for straight cuts and a jigsaw for curved sections. Ensure precise measurements to maintain the boat's integrity. Once you've cut all the parts, you can start assembling the hull.
- Use epoxy to bond the plywood sheets together. Apply a generous amount of epoxy to all mating surfaces and clamp the parts securely until the epoxy cures. Follow the manufacturer's instructions for curing time.
- Add support structures, like ribs and stringers, to provide strength and rigidity.
- Install any required bulkheads or other structural elements.
Step 4: Finishing and Waterproofing
After the boat is fully assembled, it's time to finish and waterproof it.
- Sand all surfaces smooth using sandpaper of progressively finer grits.
- Apply a layer of epoxy to all exterior surfaces, paying special attention to joints and seams. This creates a watertight barrier.
- Apply a final coat of paint or varnish to protect the wood and enhance the boat's aesthetics. Choose a marine-grade paint or varnish specifically designed for boat use.
Step 5: Launching and Enjoying Your Boat
Congratulations! Your plywood boat is ready to launch.
- Test your boat in calm waters and gradually increase the waves as you gain confidence.
- Always wear a life jacket when boating, and practice safe boating habits.
- Most importantly, enjoy your creation and the joy of gliding across the water in a boat you built yourself!
0 comments:
Post a Comment